Best DIY Nails At Home
With Summer coming around and lots of time on my hands, I have been honing my best DIY nails at home. How are you all doing? Summer is here and I could not be more excited that the girls are out of school and we have some sort of freedom each day. I know we need to come up a schedule but for now we are basking in not having to do distance learning. Did anyone struggle with DL? We certainly did so this is a welcome break.
My Journey Into DIY Beauty
During this whole stay at home time, I have started to do quite a lot DIY Beauty treatments on myself. Even my 8-year-old has been in on it. On any given day, you might catch us watching a YouTube tutorial on applying makeup. Honestly, it has been a lot of fun. She hasn’t quite mastered the “less is more” idea yet but we are getting there. Once we were at home for a while, I quickly realized I had to figure out all thing’s beauty – nails, my crazy eyebrows, eyelashes, waxing. Over the past few years, I had gotten so comfortable running to the nail salon at the last minute but with it closed I had no option. I used to do my own nails all the time so I knew I could do them again. I am loving figuring out my best DIY nails at home.
DIY Beauty: At Home Nails Edition
So for today’s post I am focusing on my best DIY nails at home, be on the lookout for future posts about all things beauty. Starting with research is what I normally do when I am trying to figure something out. I wanted to find an option that was not only easy but would last a while. I have come up 3 options I think you will really like. They require different skill levels but none of them are very difficult. Overall, I have been thrilled with not spending hours in the salon. Honestly, I just don’t enjoy it anymore. All of these options can be done in front of the TV watching your favorite show. That is a win for me. It will also save you hundreds of dollars – I love budget friendly options. Below, are my 3 options in order of easier to more difficult.
First off, I want to say that none of my posts are sponsored and I am not making money off them. At least not yet.
Best DIY Nails At Home: Option 1
Sally Hansens No Light and Vegan Base coat
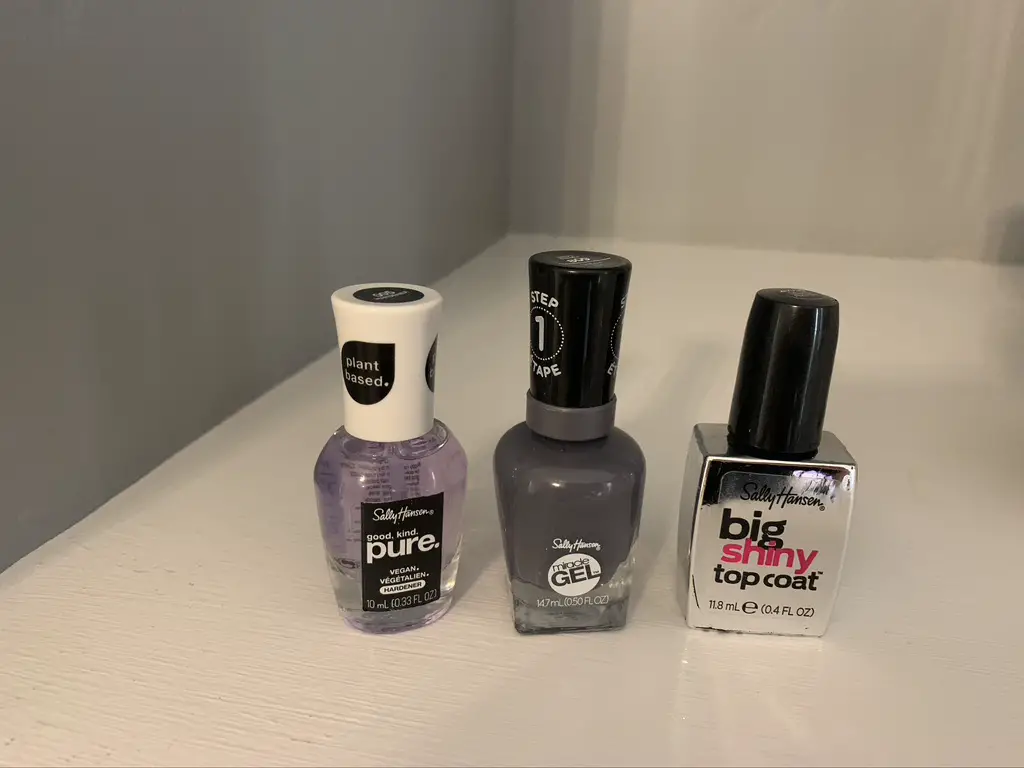
This one is super easy and stays on your nails for at least 4 to 7 days. It is like a traditional polish and does not require anything special to put on. Just paint it on, let dry and go. It is great for toes and hands and is easy peasy. This one is perfect if you would like a great option and you do not want to mess with gel or dip polish. I have found if your nails chip a bit on the tips, you can just add another coat of color and the top coat. This has been a favorite of mine for years and I just love it.
I start with the vegan base coat, then 2 coats of color (this one is grey no light but you can also do the Xtreme color) then I finish with the big shiny coat. This makes it look like a professional manicure.
Best DIY Nails At Home: Option 2
DND Gel Polish with Gel UV light
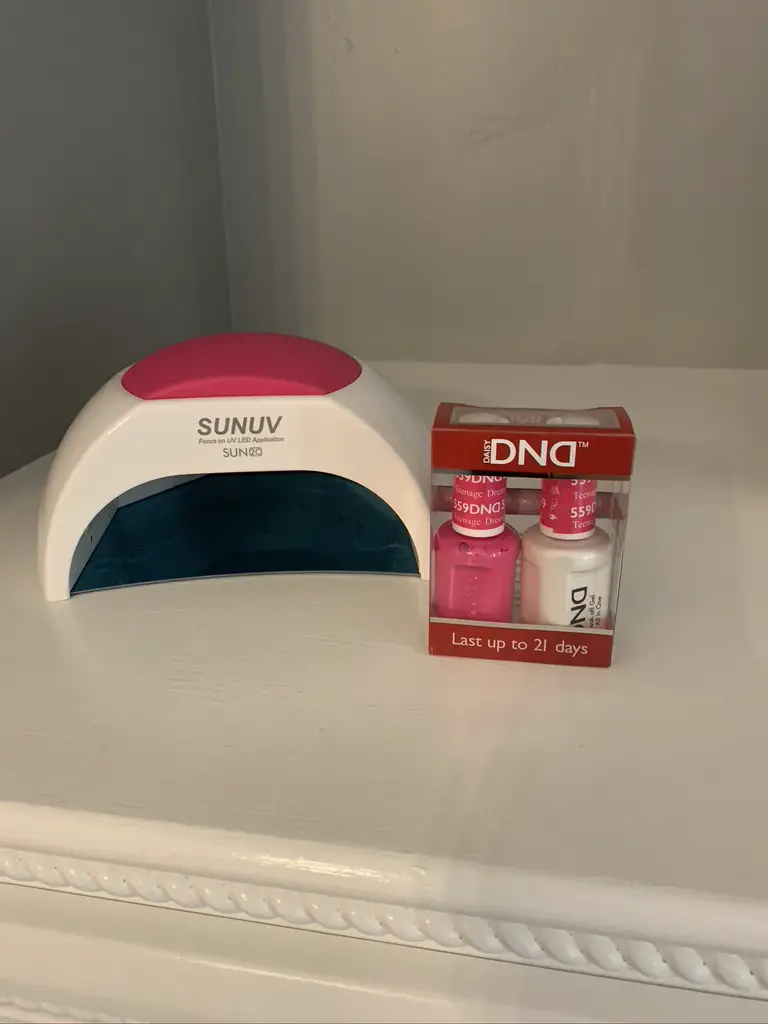
For the more advanced crowd, gel polish with the UV light is the way to go. It is similar to regular polish in that you paint it on. In order to cure it you must put your hands under UV light for 30 – 60 seconds after each coat. I also found that it is best to stay away from your cuticles and skin or it dries hard and peels off quickly. This takes a bit of getting used to. I settled on DND polish since I was familiar with it from my nail salon and read good reviews.
You can purchase it at your local beauty supply store or order it straight from Amazon. The UV light can also be purchased on amazon and does not need to be anything fancy, they are all basically the same. This polish lasts up to 1 – 2 weeks on me and they have some really nice colors. If it chips, you can just re-do that one nail again instead of going to the salon and having to do them all over again. To remove it, you just soak in Acetone and it comes right off. Sometimes I have had to scrape it off a bit but it is not difficult and takes less then 15 minutes. I like this option since there are so many colors to choose from and again not much learning curve.
Best DIY Nails At Home: Option 3
Avva Dip Powder
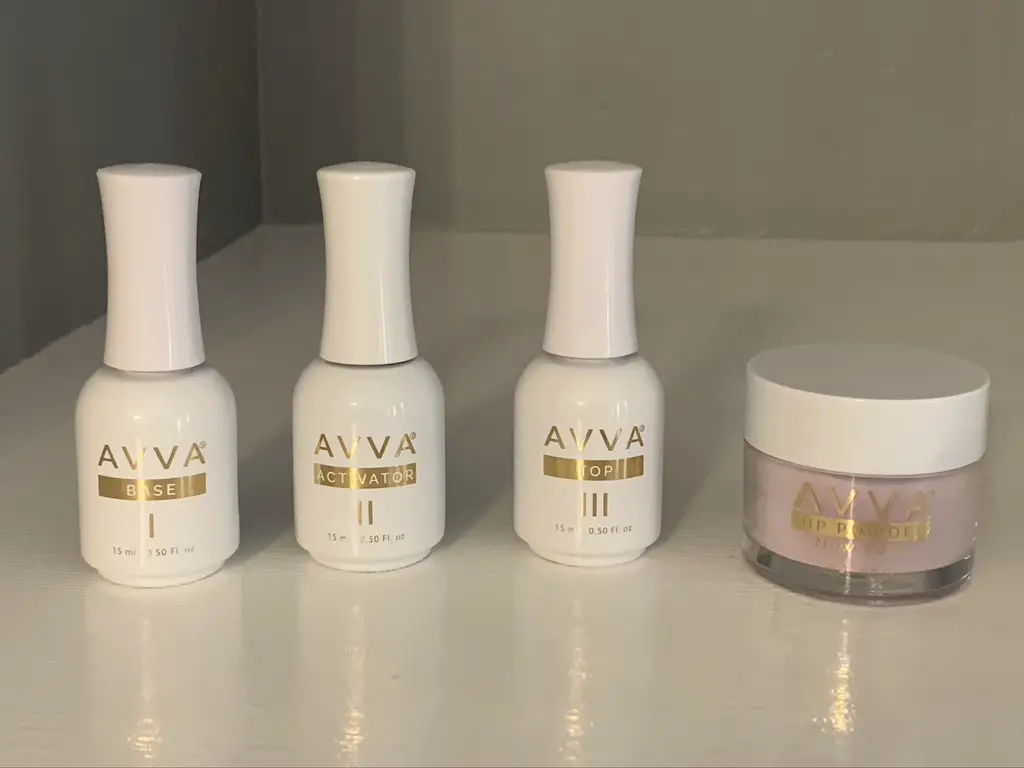
This is the most difficult of the options and takes a little more skill but don’t let that scare you away, it’s a really great option. I feel like dip powder is not as harsh on my nails but lasts a really long time. So far, I have applied dip powder 2 times and it was much easier than I imagined. You just follow the directions and you are good to go.
I have found it takes less time than the salon so that’s a plus in my book and as I mentioned earlier, it is friendly on the budget. After my research, I decided on the Avva Dip Powder. Honestly, I think most of them will work just great and I might have fallen for their marketing. I bought the large kit but if I had to do it again, I would buy the smaller kit and purchase individual colors.
A Note About Dip Powders
If you have never done Dip Powder I would recommend getting them done one time in the salon to see the process. There are several steps to application. The first is a simple cleaning of the nails, then apply coat 1 and dip. For the first dip you do not want to go all the way to the cuticle. After applying your first dip you will tap off excess.
The next 2 coats are similar but go closer to the cuticle. After you have done 2 – 3 coats of the dip, you will do the Activator (Step 2) then file the nail bed smooth. This part seemed overwhelming at first but really is quite easy. Once they are even you put the Top Coat (Step 3) and wait for it to dry and you are good to go. My current set has been on over 1 week with no nicks or chips and I am quite happy with the. Next, I plan to try tips so I have nice long nails. I hope I have the skills, wish me luck.
Want More? Let Me Know!
I hope this post was helpful and inspires you to try some different best DIY nails at home options. Having my nails painted makes me feel great and shows off my creative side. I am sure I will hit the nail salon in the future especially if I have an even but for now, I am going the DIY route. Let me know if you are interested in more detail on any of these options and I will write up a longer post.


I really love Sally Hansen’s no light polishes. They’ve been really handy during the pandemic and easy to use. Thanks for sharing!
Kate – thank you for commenting – I agree the Sally Hansen’s polish is so great!